Monday, 17 November 2014

Mini Ripple Blanket for Dolls

I made a Mini Ripple Blanket for Dolls using yarn left over from my Cosmic Rays Ripple. So what do you think? Doesn't it look amazing? 
I got my inspiration to make a doll blanket from blogger Lucy at Attic24 when I found photos of her doll blanket ripple here. Since Lucy didn't post a pattern, I followed her regular ripple blanket instructions but changed colour each row instead of every other row. I think the scale of one row colour stripes looks better on a doll sized blanket. 

It looks like Lucy made her ripples a little tighter using a 10 count repeat instead of 14. I might try that next time as I think it will look even better with mini ripples. 
Still I think it looks great and my current toys are pleased to pose upon it. If you're looking for a quick easy project, this one is perfect. I didn't time my efforts but I can tell you I started Friday and finished Sunday night. I estimate it took about 8 hours to finish. Although the rows are short, there are a lot of colour changes. 

I stopped to weave in the ends before finishing the final row. With 35 rows and a 3-round border, there are a LoT oF YaRn EnDs... 81 in total. 
With the ends out of the way, I worked the last row then turned and continued down the left side before finishing off which eliminated one join.  

Starting Chain - 59 (14x4+3)
Finished Size - 16" x 20.5"
1 row per stripe (all worked right to left for right-handed crocheters)
35 stripes
13 colours (left over from Cosmic Rays Ripple)
Time to Complete - Approximately 8 hrs
Hook size - 5 mm

I love this image showing my Mini Ripple Blanket cross ways on top of my Cosmic Rays Ripple. Lucy snapped a similar shot of her doll blanket and I thought it looked mesmerizingly perfect.
The colour stripes used for my Mini Ripple Blanket as shown in the image above from right to left are listed below. 
  1. Fern
  2. Lavendar
  3. Beige
  4. Teal
  5. Crimson
  6. Sage
  7. Goldenrod
  8. Medium Teal
  9. Silk
  10. Grey Mist Heather
  11. Sandstone
  12. Sapphire
  13. Mai Tai
  14. Medium Teal
  15. Silk
  16. Beige
  17. Crimson
  18. Goldenrod
  19. Sage
  20. Fern
  21. Grey Mist Heather
  22. Teal
  23. Mai Tai
  24. Crimson
  25. Silk
  26. Sandstone
  27. Sapphire
  28. Lavendar
  29. Medium Teal
  30. Silk
  31. Grey Mist Heather
  32. Sage
  33. Goldenrod
  34. Medium Teal
  35. Fern
Border:
Round 1: Fern
Round 2: Mai Tai
Round 3: Teal

I am more than pleased with my Ripple Blanket for Dolls and plan to make another but first I want to try a new pattern. I was so excited to find this doll pattern by Tracey MacIntyre offered for free last week. It's called "Doll in Bear Hoodie" and can be found here. As you can see, I'm ready to start and will be sure to share photos once I finish. 
I should also mention, I finally started prepping for our bike tour. My husband and I did an intense one hour session on our trainers yesterday. It was challenging but felt good. I've been trying to come up with a way to fit in training without taking too much time away from crochet. I think I've come up with a great idea.

We like to watch a TV series in the evening for an hour and we're currently watching Reign. I suggested we ride our trainers while watching our series instead of sitting on the sofa and snacking. Let's hope he likes my idea. It's sure to be fun and oh so good for us.

Be the first to comment - click on No comments: below.

Saturday, 15 November 2014

Fantastic Flea Market Finds

We visited the Western Fair Market today to stock up on food and order a fairy door from The Sidhe Ring on the second floor. 

We have a hole in the drywall of our basement with an unused clean out pipe behind vapour barrier. When we repainted our basement in the fall, we couldn't decide how to cover the hole so we left it. 

We also have unused water lines and a drain pipe sticking out of the wall a little further along. We think they were intended for a bar sink but there is no space with the current set up and we have no plans to install a bar. Even so we didn't want to cut the pipes so we left them.

I think both the pipes and the hole are a bit of an eye sore so have come up with a creative solution. The hole is to be covered with a custom crafted fairy door to add a bit of whimsy for our grandchildren when they visit. 
The artist at Sidhe Ring will add hinges to the fairy door so it opens and I plan to cover the opening behind the door with black felt so fairy messages can be left for inquisitive little ones.

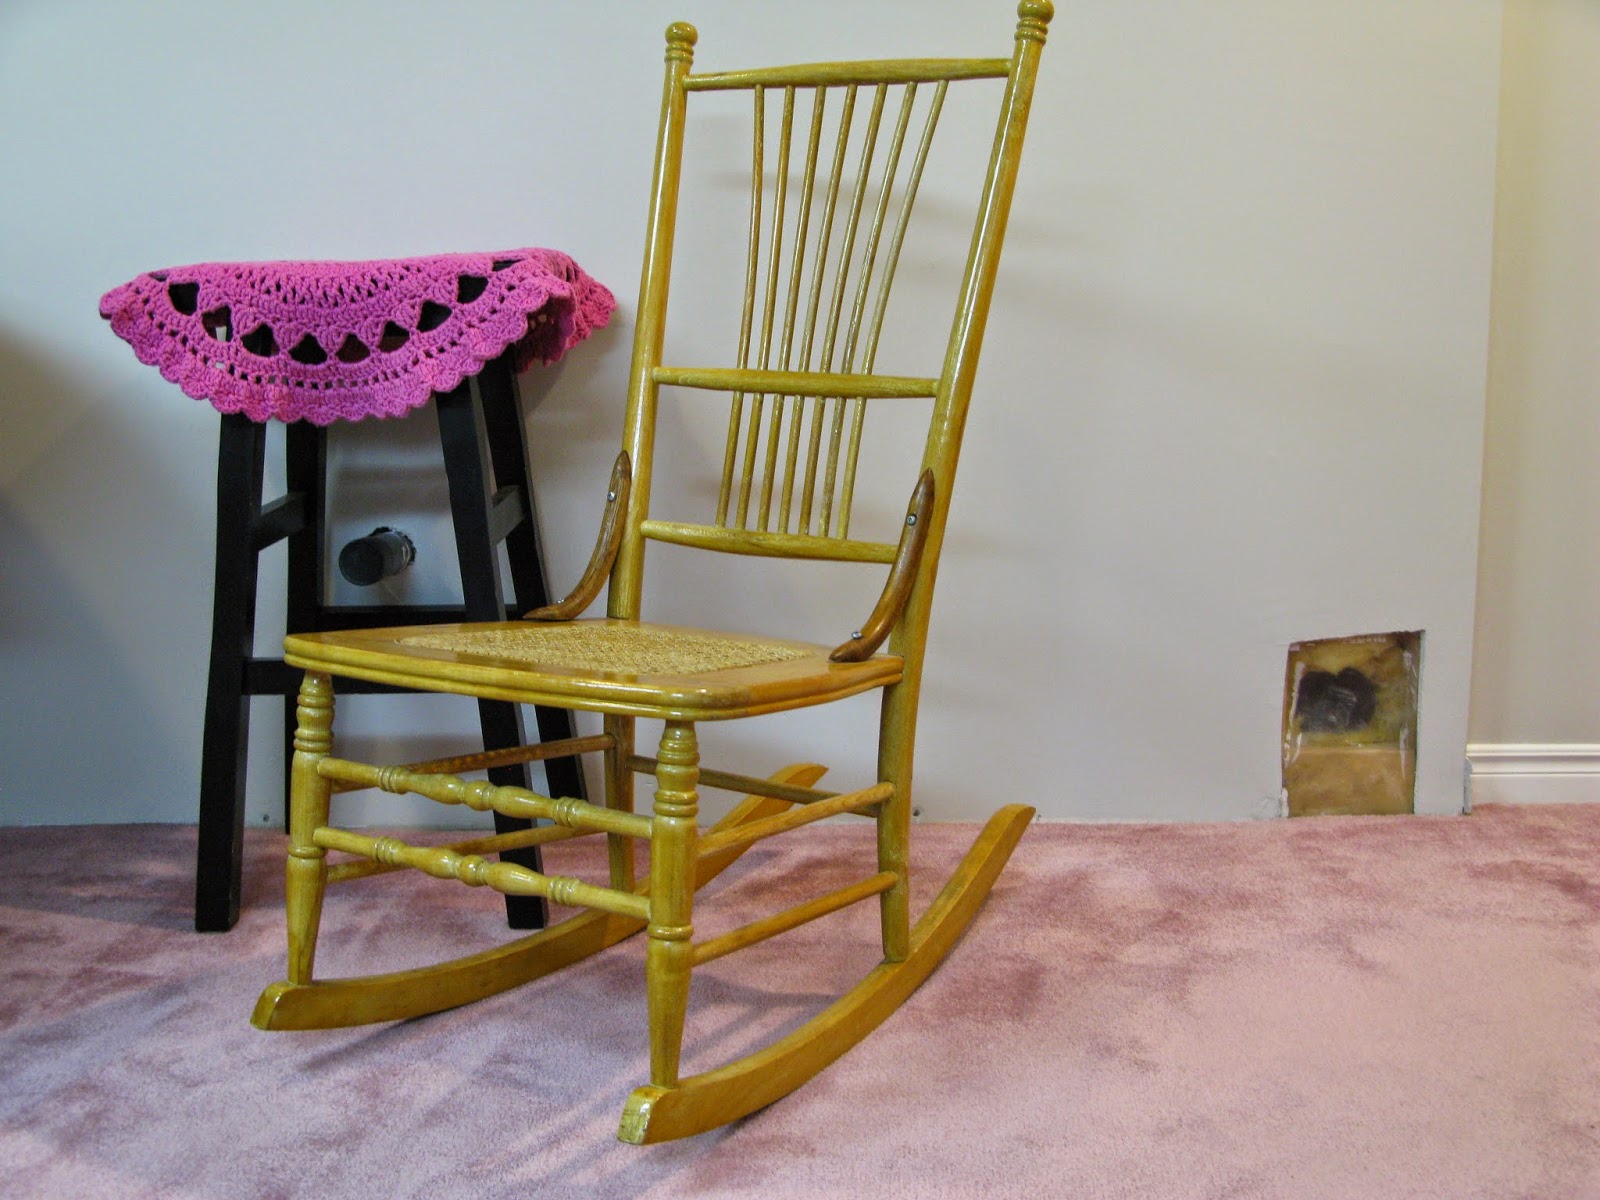
Today we visited Memory Lane Antiques which is a flea market in London and I was very pleased to find a solid wood bar stool for only $10. I covered it with a pretty pink crochet doily (of course) and I love it. A perfectly simple solution for unsightly pipes.
You can see the drain pipe from this angle but it hides them quite nicely and also works as a side table. I expect it will coordinate well with the new fairy door. I will be sure to share a photo once it's done. 

I am also very excited with my other Fantastic Flea Market Find. It wasn't planned but was something I had seen on Pinterest and considered a cool idea. My husband laughed when I showed him but did agree it was cool enough to buy for only $15. What do you think of it? Isn't it the coolest old rustic wooden tool box?
It has flecks of paint and the wood is saturated in old oil. It's crooked and some of the nails have fallen out. It was exactly what I wanted for my table centrepiece. I've filled it with treasures and put it on display. 

I am more than pleased with my Fantastic Flea Market Finds today. Today was full of planning and play resulting in two blog posts. My perfect kind of day really.

Tomorrow I crochet and ride my bike. At least that's my plan. I just checked the calendar and we have only 10 weeks left to get ready for our bike tour in Cuba. Yikes, the count down has begun.


Be the first to comment - click on No comments: below.

Cosmic Rays Ripple Blanket

I finished my Cosmic Rays Ripple Blanket last night. It is soft, colourful and perfect in our family room draped across the back of the sofa. I just love the look of it.
Yes this one is a keeper. I love it from every angle, from the side, from the front and from the back.
What do you think? Do you like the bright, bold ripply colours? Would you like to make one too? As mentioned in my last post, I followed this tutorial posted by blogger Lucy at Attic24. Her instructions are very clear and easy to follow.

As promised, here are the technical details for my Cosmic Rays Ripple Blanket for the crocheters out there who might like to make one too. 

Starting Chain - 213 (14x15+3)
Finished Size - 90" x 65" (229 cm x 165 cm)
2 rows per stripe 
71 stripes
15 colours (2-100 g balls of each colour)
Time to Complete - Approximately 42 hrs (30 mins per stripe + border)
Hook size - 5 mm

Yarn Used (15 colours):
  • Bernat Satin (fern)
  • Deborah Norville Everyday Soft Worsted (aubergine)
  • Red Heart Soft Touch (beige)
  • Bernat Satin (sapphire)
  • Bernat Satin (mai tai)
  • Bernat Satin (goldenrod)
  • Bernat Satin (silk)
  • Bernat Satin (sandstone)
  • Bernat Satin (teal)
  • Bernat Satin (sage)
  • Bernat Satin (crimson)
  • Patons Canadiana (pale grey mix)
  • Bernat Satin (grey mist heather)
  • Patons Canadiana (medium teal)
  • Bernat Satin (lavendar)
As I list out the stripe colours for this blanket I can't help but think, "Wow, that is a lot". The pattern called for 84 stripes but I stopped at 71 because worsted weight yarn makes a much bigger blanket than finer DK yarn. This is a photo of the blanket stretched out showing the stripe colours listed 1 through 71 from top to bottom.
If you decide to make one, it is probably best to choose your favourite colours and order them any way you like. I think half the fun of crochet ripple blankets is watching them evolve but since I promised, here is my list starting from top to bottom (beginning to end). 

Wait there's more. Scroll through the list to the end to see what I'm working on next.
  1. Fern
  2. Aubergine
  3. Beige
  4. Sapphire
  5. Mai Tai
  6. Sage
  7. Teal
  8. Sandstone
  9. Silk
  10. Goldenrod
  11. Crimson
  12. Pale Grey Mix
  13. Grey Mist Heather
  14. Medium Teal
  15. Lavendar
  16. Sage
  17. Mai Tai
  18. Sapphire
  19. Teal
  20. Medium
  21. Grey Mist Heather
  22. Sandstone
  23. Beige
  24. Aubergine
  25. Silk
  26. Pale Grey Mix
  27. Crimson
  28. Goldenrod
  29. Fern
  30. Silk
  31. Grey Mist Heather
  32. Teal
  33. Mai Tai
  34. Lavendar
  35. Sage
  36. Medium Teal
  37. Crimson
  38. Silk
  39. Teal
  40. Aubergine
  41. Sapphire
  42. Grey Mist Heather
  43. Pale Grey Mix
  44. Grey Mist Heather
  45. Sandstone
  46. Silk
  47. Beige
  48. Fern
  49. Mai Tai
  50. Crimson
  51. Teal
  52. Sandstone
  53. Medium Teal
  54. Sandstone
  55. Lavendar
  56. Sapphire
  57. Sandstone
  58. Goldenrod
  59. Grey Mist Heather
  60. Mai Tai
  61. Fern
  62. Crimson
  63. Sage
  64. Medium Teal
  65. Sage
  66. Crimson
  67. Grey Mist Heather
  68. Sandstone
  69. Lavendar
  70. Sapphire
  71. Fern
Border Colours:
Round 1: Fern
Round 2: Silk
Round 3: Teal

Phew, I can't believe I finished my Cosmic Rays Ripple Blanket in only 2 weeks. Our poodle approves and loves to get in on the action. I caught her sitting pretty on the blanket and looking oh so cute.
You might be wondering what next? Well, since I have leftover yarn from both my Cosmic Rays Ripple and my Sweet Summer Ripple AND I have a granddaughter, I think a few doll ripple blankets might be fun. You can see I've already started. 
Last night, my daughter requested toys for a friend who has three little girls. That's perfect, doll blankets and dolls. Fun winter projects to feed my creativity. 

Time to get moving, we're off to the market to stock up on food and order a whimsical fairy door to cover a hole in the wall in our basement. My excuse is our grandchildren but really I love the idea of adding fairy fun to our basement. I can't wait to see how it looks. 


Be the first to comment - click on No comments: below.
Sunday, 9 November 2014

Blanket Making Progress

My blanket making progress is impressive but then I am totally obsessive about it. Every night I come home, walk the dog and settle down to crochet. I barely stop to make dinner. My meal of choice while crocheting is nachos with melted cheese. Anything quick and easy so I can get back to work. I also love my little creation corner in our family room by the fireplace. It's oh so cozy.
I spread out my Cosmic Rays Ripple Blanket for measuring. You can read about my blanket beginning and naming here. In just one week, it has grown considerably measuring approximately 160 cm square with 54 of 84 stripes completed using worsted weight yarn. I am following this tutorial posted by blogger Lucy at Attic 24. Her blankets are made using lighter DK yarns which produce a finished size of 110 cm x 170 cm with a starting chain of 213. 
I started with 15 - 100 g balls of yarn but bought more of each colour to ensure I have enough. Doesn't it look amazing on our sofa? 
As always our poodle approves and looks forward to the day she can cuddle properly on this soft sofa blanket. 
People often ask why I don't sell my creations. Considering each ball of yarn costs approximately $4 including tax, I estimate this blanket will cost about $120 to make (30 balls x $4 each). Would anybody be willing to pay even that much without considering the cost of labour? 

I am making this big, bright beautiful blanket for ME and I do LoVe the look. So yes, I think it's worth the cost, time and effort. Would I make it to sell and make little to no money for my time? Somehow that idea has little to no appeal. Surely this is a common dilemma for crafters. 

My crochet is my creative outlet and I truly LoVe that. I LoVe to watch the colours ripple along together. I LoVe to watch my Cosmic Rays Ripple Blanket Making Progress.

I'll be sure to share photos with a listing of the stripe colours when I'm done. Hopefully soon so I can get serious about training for our 2-week bike tour in Cuba booked for January 24th. I love biking but right now my blanket calls so I choose to crochet.

Be the first to comment - click on No comments: below.

Sunday, 2 November 2014

Naming My Project

This weekend I am so excited to finally be working on my bright bold ripple blanket. I spent Friday evening and Saturday morning winding all the yarn into balls. It takes time but is so worth the effort. 
Working with a tangle-free ball of yarn in a yarn bowl is pure pleasure. You can see my yarn bowl peaking out from under the start of my ripple blanket. It takes me 15 minutes to complete just one row, so 30 minutes per colour. Seven stripes done with 77 more to go. I am following a tutorial posted by blogger Lucy at Attic 24. You can find it here if you would like to make one too. 
I love the colours and names Lucy selected for her ripple blankets. I have chosen a different mix of bold, beautiful colours for my blanket and wanted to name it appropriately. After much thought and a few rows in, I've come up with Cosmic Rays Ripple Blanket. These images found searching the word "cosmic" incorporate all my yarn colours and were my inspiration. 
 
I think the name is perfect. As this blanket grows, row by bright row, I can definitely visualize cosmic rays. Do you see what I mean?
I am using a mixture of 100% acrylic worsted weight yarns as listed below (left to right starting with top row):
  1. Bernat Satin (fern)
  2. Deborah Norville Everyday Soft Worsted (aubergine)
  3. Red Heart Soft Touch (beige)
  4. Bernat Satin (sapphire)
  5. Bernat Satin (mai tai)
  6. Bernat Satin (goldenrod)
  7. Bernat Satin (silk)
  8. Bernat Satin (sandstone)
  9. Bernat Satin (teal)
  10. Bernat Satin (sage)
  11. Bernat Satin (crimson)
  12. Patons Canadiana (pale grey mix)
  13. Bernat Satin (grey mist heather)
  14. Patons Canadiana (medium teal)
  15. Bernat Satin (lavendar)
Wow, 15 beautiful colours randomly arranged for this ripple blanket. I can hardly wait to see how my Cosmic Rays Ripple Blanket turns out. With 77 more stripes plus a border and weaving in all those ends, I calculate it should take about 44 more hours. Given that I've also committed to training for our bike trip to to Cuba in January, it might take me a while.

Oh well, I'm thoroughly enjoying the process and I'm sure it will be perfectly amazing. I promise to share a photo when it's finally finished. 

Be the first to comment - click on No comments: below.

Friday, 31 October 2014

Granny Circle Christmas Tree Skirt

Last year when I took down our Christmas tree, I discovered our cat had thrown up on my cute felt Teddy Bear Christmas tree skirt . It was something I had cherished because a friend made it for me over 30 years ago. I tried washing it in a net bag on gentle but it fell apart.

I resolved to make a new Christmas tree skirt for 2014, something washable. What do you think of this Granny Circle Christmas Tree Skirt? I think it's perfect.
I've used a little pedestal table to show how it will fit around the base of our Christmas tree. I considered pulling out our tree for photos but realized that was way too much effort. Christmas decorating can wait until December which is only a month away.

I love the way my Granny Circle Christmas tree skirt turned out. I love the granny stitch, I love circles and I even love the colours. Who says traditional Christmas colours must be used? I was especially happy to find inexpensive yarn on sale. This tree skirt is both pretty and practical. If you decide to make one too, use whatever yarns and colours make YOU happy. 
I am very excited to share this pattern. It's especially exciting as it is my first original pattern. 

The granny stitch and a granny circle are not original but this granny circle is unique. It has a hole in the middle to accommodate the Christmas tree post and is split down the side for wrapping around the tree stand. It's the hole and the split that make this pattern original.

When this Granny Circle Christmas Tree Skirt is spread out on the floor, you can see how it forms a neat circle with a hole in the centre. 
Our poodle approves and loves to get in on photo sessions. Isn't she pretty with her Halloween kerchief? It's Halloween and I'm featuring Christmas crochet. I'm sure fellow crafters understand the rush. 
 You can clearly see the granny stitch and shell edge in this photo.
Folded and ready for Christmas. I know it's early but I wanted to have it done in time to share in case any of you might like to make one too. The pattern is listed below. I hope it's clear and easy to follow. 
If you decide to make a Granny Circle Christmas Tree Skirt using my pattern, please do send me a photo. I'd love to see your version. 

GRANNY CIRCLE CHRISTMAS TREE SKIRT


PDF Version

Supplies:

Any worsted weight yarn in colours you like but these are the yarns and colours I used:
  • Peaches and Crème cotton yarn (Panorama) – part of a cone (14 oz)
  • Bargain Bin 1 pound of worsted weight acrylic yarn (sage)
  • Bernat Handicrafter cotton yarn (black currant and off-white) for border
5.00 mm crochet hook
Yarn needle for weaving in ends

Stitches Used:

Chain (ch)
Slip Stitch (ss)
Single Crochet (sc)
Half Double Crochet (hdc)
Double Crochet (dc)
Granny = (3 dc + ch 1) in ch-1 space
Granny Increase = (3 dc + ch 1 + 3 dc + ch 1) in ch-1 space

Note: starting chain 3 counts as beginning double crochet

Instructions:

Starting with Peaches and Crème cotton yarn (or any worsted weight yarn you choose)

Chain 26

Note: Crochet into back ‘bump’ of the starting chain, it leaves a nice finish along the edge.

Row 1: dc in 4th ch from hook, 2 dc in same space, ch 1, *skip ch, 3 dc in next ch, ch 1**, repeat * to ** around, dc in last ch, ch 3 and turn (there should be 11 ch-1 spaces)
Row 2: 2 dc + ch 1 in beginning ch space (first Granny completed), Granny in each ch-1 space across, dc in top of ch 3 at end of row, ch 3, turn
Row 3: 2 dc + ch 1 + 3 dc + ch 1 in beginning ch space (first Granny Increase completed), Granny Increase in each ch-1 space across, ending with dc at top of ch 3 at end of row, ch 3 and turn
Rows 4, 5: Repeat Row 2 (no increases)
Row 6: Granny in 1st ch-1 space, Granny Increase in next ch-1 space (increasing every other ch-1 space, ending with dc at top of ch 3 at end of row, ch 3 and turn
Rows 7, 8, 9: repeat Row 2 (no increases)
Row 10: Granny in 1st ch-1 space, Granny in 2nd ch-1 space, Granny Increase in 3rd ch-1 space (increase every 3rd ch-1 space across), ending with dc at top of ch 3 at end of row, ch 3 and turn
Rows 11, 12, 13: Repeat Row 2 (no increases)
Row 14: Granny in 1st ch-1 space, Granny in 2nd ch-1 space, Granny Increase in 3rd ch-1 space (increase every 3rd ch-1 space across), ending with 1 Granny in each of the last 2 ch-1 spaces and dc at top of ch 3 at end of row, ch 3 and turn
Rows 15, 16, 17: Repeat Row 2 (no increases)
Row 18: Granny in 1st ch-1 space, Granny in 2nd ch-1 space, Granny in 3rd ch-1 space, Granny Increase in 4th ch-1 space (increase every 4th ch-1 space across), ending with 1 Granny in each of the last 2 ch-1 spaces and dc at top of ch 3 at end of row, ch 3 and turn
Rows 19, 20, 21, 22: Repeat Row 2 (no increases)

Note: I finished off at end of row 21 and switched to sage acrylic yarn for row 22

Row 23: Granny in 1st ch-1 space, Granny in 2nd ch-1 space, Granny in 3rd ch-1 space, Granny Increase in 4th ch-1 space (increase every 4th ch-1 space across), ending with dc at top of ch 3 at end of row, ch 3 and turn
Rows 24, 25, 26, 27: Repeat Row 2 (no increases)
Row 28: Granny in 1st ch-1 space, Granny in 2nd ch-1 space, Granny in 3rd ch-1 space, Granny Increase in 4th ch-1 space (increase every 4th ch-1 space across), ending with 1 Granny in each of the last 2 ch-1 spaces and dc at top of ch 3 at end of row, ch 3 and turn
Rows 29, 30, 31, 32: Repeat Row 2 (no increases)
Row 33: Granny in 1st ch-1 space, Granny in 2nd ch-1 space, Granny in 3rd ch-1 space, Granny Increase in 4th ch-1 space (increase every 4th ch-1 space across), ending with 1 Granny in last 2 ch-1 space and dc at top of ch 3 at end of row, ch 3 and turn
Rows 34, 35, 36, 37: Repeat Row 2 (no increases)
Row 38: Granny in 1st ch-1 space, Granny in 2nd ch-1 space, Granny in 3rd ch-1 space, Granny in 4th ch-1 space, Granny in 5th ch-1 space, Granny Increase in 4th ch-1 space (increase every 6th ch-1 space across), ending with 1 Granny in last 2 ch-1 space and dc at top of ch 3 at end of row, ch 3 and turn
Row 39: Repeat Row 2 (no increases) – Finish off at end of row

Border: 

2 rows – For each row, join yarn at far right side with right side facing (working counter clockwise). Again use any colour combination you like.

Note: The right side is when the odd # row is facing up, go back to the beginning of row 39 to join your yarn. Start with black currant (purple).

Row 1: Join with ss at top of ch 3, sc in same stitch, *ch 3, sc in next dc**, repeat * to ** across, finish off at end of row. Switch to new colour (off-white).
Row 2: Shell Edge starting at far right with right side facing. Join with ss in 1st sc *(1 sc, 1 hdc, 1 dc, 1 hdc, 1 sc) in ch-3 space, ss in sc**, repeat * to ** across ending with ss in last sc and finish off

Finishing:

Weave in loose ends using yarn needle then sit back and admire your work. You’re done. You've made a beautiful new Granny Circle Christmas Tree Skirt that will last for years and look amazing covering the not-so-nice Christmas tree stand. 


* * * * * 

Be the first to comment - click on No comments: below.

Saturday, 25 October 2014

Doilies Can Be Delightful

I love making crochet doilies but I prefer using worsted weight yarn instead of traditional lace weight crochet cotton. 

Last weekend, I made a doily using a free pattern posted by Crochet Galore called November Doily of the Month. If you would like to make one too, you can find it here. 

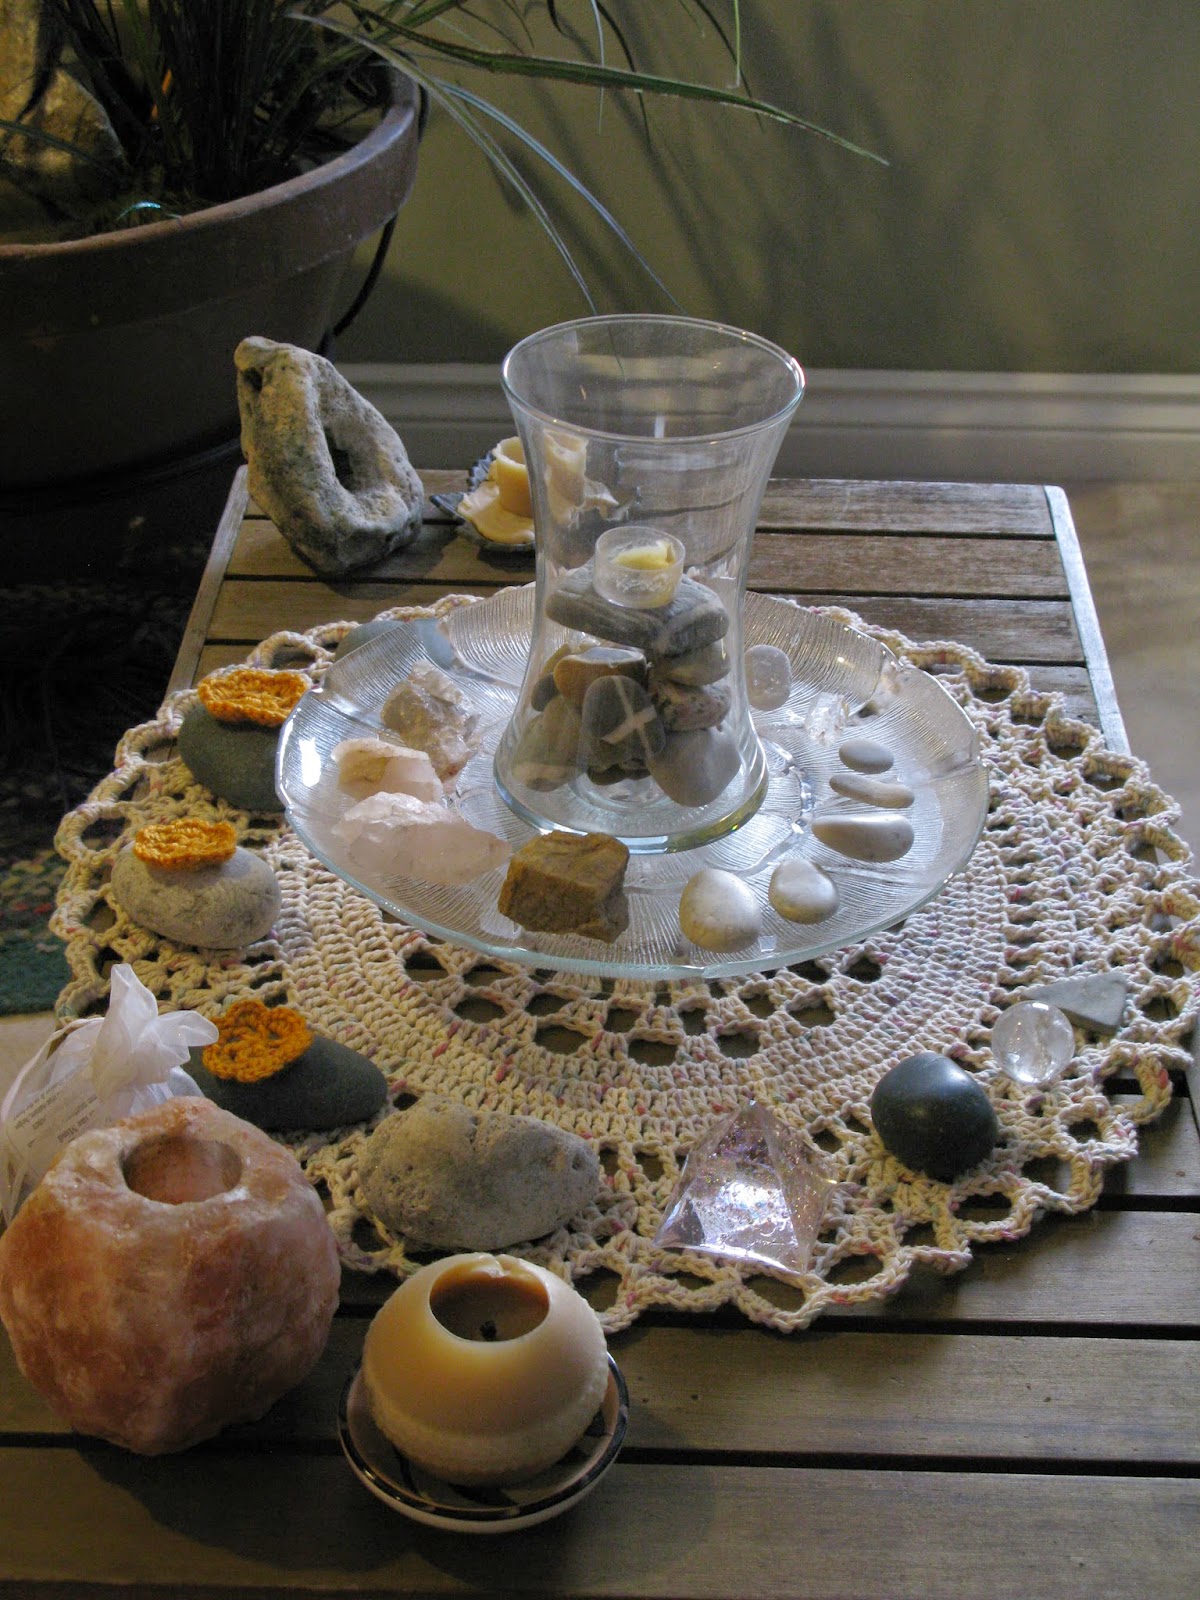
This doily was made using Peaches and Creme worsted weight cotton yarn in Panorama (off-white with coloured flecks). I think it's perfect for displaying my special stones collected on various coastal hikes, crystals and candles. I love this doily in my meditation and crochet corner. It looks amazing from every angle.
My doily done in worsted weight yarn looks delightful. Don't you agree?
The orange crochet flowers adorning the rocks add a nice touch as well. 
I also made one using Bernat Handicrafter cotton in off-white. I wanted to cover a stool that doubles as a side table when I ride my trainer. I think it looks delightful draped over a stool beside my bike. 
I plan to be spending a lot more time on the bike this winter as we have signed up for a two-week bike tour in Cuba with Canbicuba called A Tribute to Celia Sanchez. We did this tour 5 years ago and loved it. You can read all about it in this post. We are very excited to be going again. With just three months to get in shape, wish us luck with our training.
I'm hoping it helps to be surrounded by pretty things to take my mind off the boredom of riding indoors. TV definitely helps so the stool will be put to good use holding the remote control and maybe an extra water bottle or two.

I should also mention I'm currently working on a crochet Christmas Tree Skirt using the same Peaches and Creme yarn in Panorama. Not traditional Christmas colours, but then I like to do things a little differently and I think it will look perfect with our tree. Once I finish I will be sure to share pictures and a pattern. 

I'm very excited about this project because I've come up with the pattern on my own. My very first original pattern. I can't wait to share it with you. 


Be the first to comment - click on No comments: below.