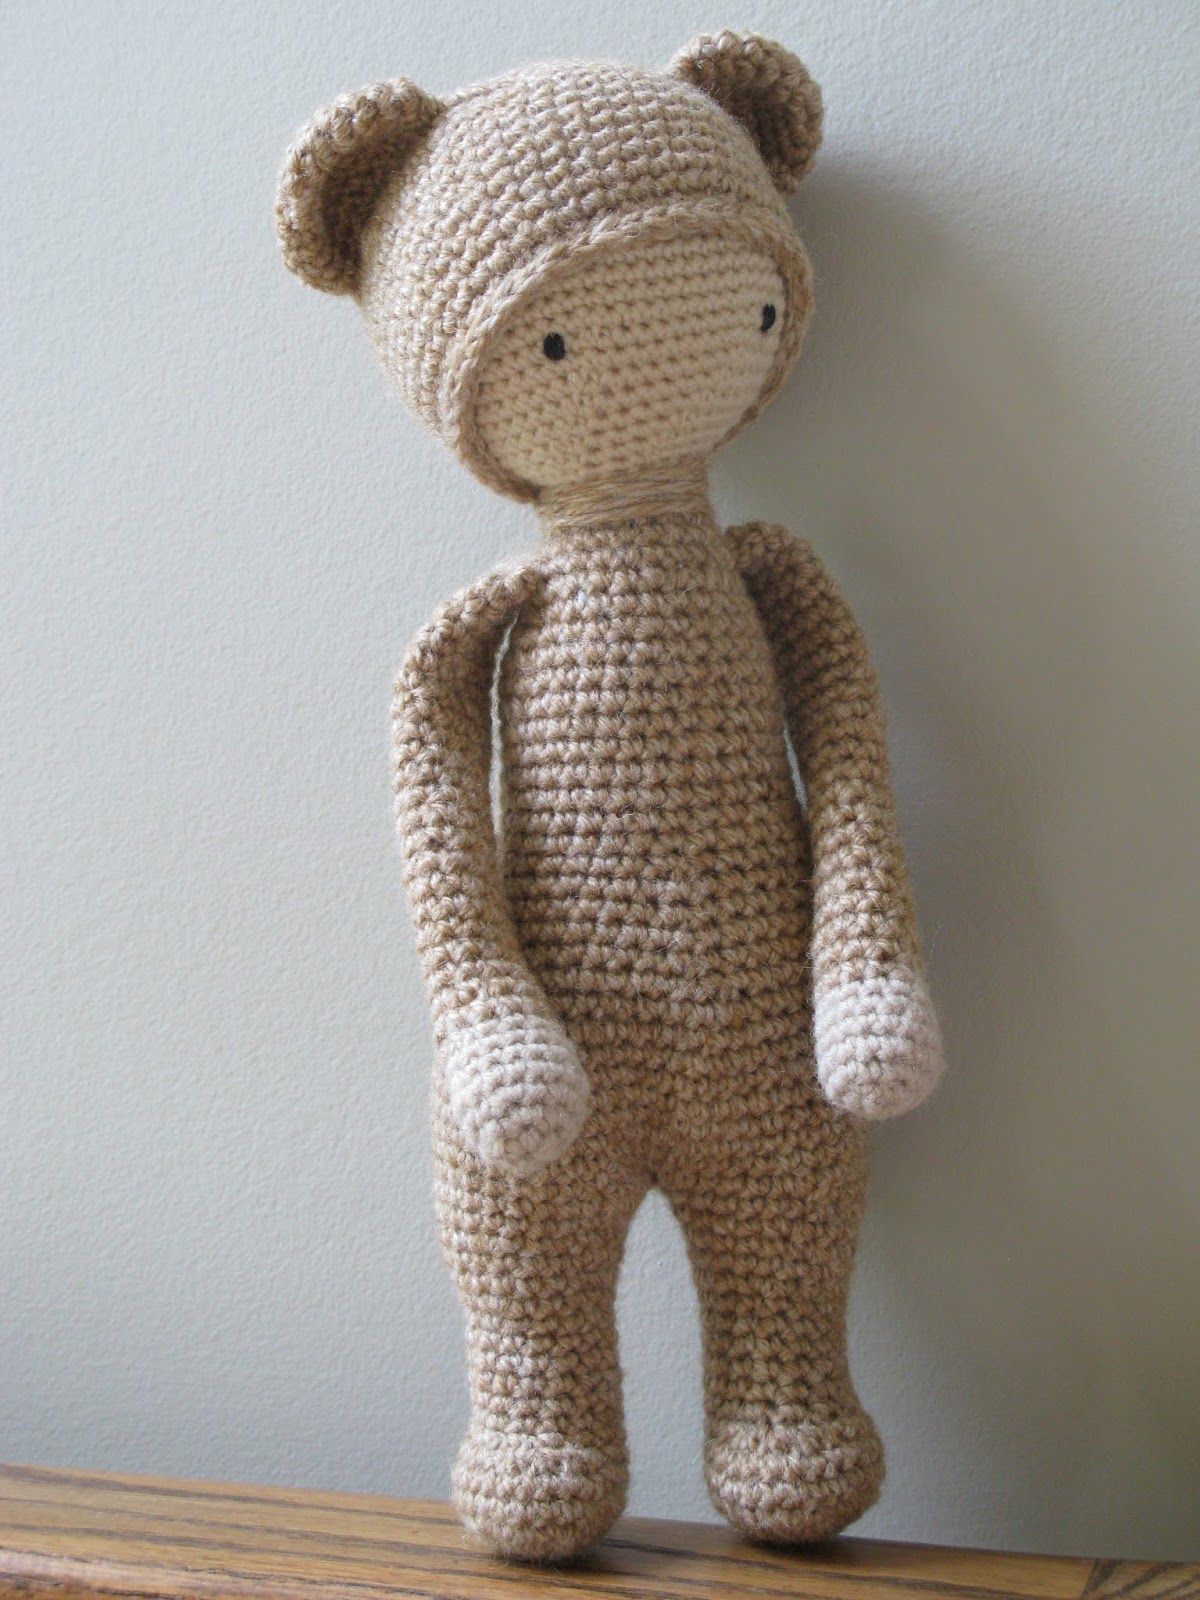
Buster (short for Stash-Buster) Bear was made using a leftover ball of light brown chunky yarn. I have no idea what kind of yarn because it came from a friend who gave me his deceased mother's stash earlier this year.
I also have no idea how much yarn exactly. I started with one big ball of hand-wound yarn finishing with only a short strand leftover ... so lucky.
Buster Bear was happy to pose for photos. Isn't he a sweet little bear?
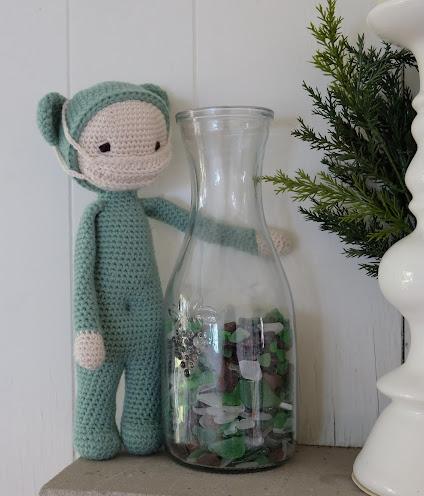
Boo Bear is soft and cuddly while Buster Bear is sturdier on his feet. Boo Bear and Buster Bear get along famously despite their differences.
Buster Bear was made following my pattern for Boo Bear with extensive alterations to allow for chunky weight yarn making up the hood, arms, legs and body combined with worsted weight yarn for the head. You can read about the controversy over Boo Bear's pattern here if you missed it.
Buster Bear is different enough from Boo Bear that I think it totally fair to share his pattern. If you look closely, you can clearly see the difference in stitch sizes. My yarn was really quite thick, unfortunately, I do not know exactly how thick. If you choose a different weight yarn, you can use this pattern as more of a guideline making alterations as required.
Buster BEAR PATTERN
Materials used:
1 ball of worsted
weight yarn in cream colour (from stash)
1 ball of chunky weight
yarn in brown colour (from stash)
Hook size = 3.25 mm +
4.0 mm
yarn needles to join
pieces
Polyester Fiberfill
for stuffing
Small amount of black
yarn (for eyes)
Stitches used:
ch - chain stitch
ss - slip stitch
sc - single crochet
inc - sc increase
dec - sc decrease
(sc2tog - single crochet 2 together)
Magic Circle - see
how here (start each
piece with magic circle)
Time to Complete - 14
hours (approximately)
Finished size - 14
inches tall
Legs (x2)
Use brown chunky yarn
and 4.0 mm hook. Working from the bottom up, starting with a magic circle, use
stitch marker to mark end of rows (work in continuous rounds with no joining)
R1 - 6 sc (6)
R2 - inc x6 (12)
R3 - (sc inc) x6 (18)
R4 - (2 sc inc) x6
(24)
R5-R6 - sc around (24)
R7 - sc2tog x4 + 16 sc
(20)
R8 - sc2tog x4 + 12 sc
(16)
R9-R16 - sc around
(16)
R17 - (3 sc inc) x4
(20)
R18-R20 - sc around
(20)
R21 - (4 sc inc) x4
(24)
R22 - sc around
(24) Finish off and stuff leg.
Body
Join legs on middle 2
stitches as shown in this tutorial. The instructions are in German but the video alone is enough
to understand the technique. Once the legs are joined continue crocheting
around both legs to form the body.
R23 - sc around (50)
R24 - sc around (50)
R25 - (5 sc inc) x 7 +
7 sc (55)
R26 - sc around (55)
R27 - sc around (55)
R28 - sc around (55)
R29 - sc around (55)
R30 - (9 sc dec) x5
(50)
R31 - sc around (50)
R32 - (8 sc dec)
x5 (45)
R33 - sc around (45)
R34 - (dec 7 sc)
x5 (40)
R35 - sc around (40)
R36 - (dec 6 sc) x5 (35)
R37 - sc around (35)
R38 - (dec 5 sc) x5 (30)
R39 - sc around (30)
R40 - sc around (30)
R41 - sc around (30)
R42 - sc around (30)
R43 - sc around (30)
R44 - sc around (30)
R45 - sc around (30)
R46 - sc around (30)
R47 - sc around (30)
R48 - dec 2x on
each hip (26)
R49 - sc around (26)
R50 - dec 1x on
each hip (24)
R51 - sc around (24)
R52 - dec 2x on
each side (20)
R53 - sc around (20)
R54 - dec 2x on
each side (16)
R55 - sc around (16)
Finish off and cut
yarn leaving a long tail to attach the head. Stuff body firmly.
Arms (x2)
Start with cream worsted
weight yarn and 3.25 mm hook
R1 - 6 sc (6)
R2 - inc x6 (12)
R3 - (sc inc) x6 (18)
R4 - sc around (18)
R5 - (4 sc dec) x3
(15)
R6 - sc around (15)
R7 - (3 sc dec) x 3
(12)
Change to dark brown
yarn at end of R7
R8 - sc around (12)
R9 - (4 sc dec) x 2
(10)
R10-R34 - sc around
(10)
Finish off and cut
yarn leaving a long tail for joining. Stuff only hands and part way up arm.
Head
Use cream worsted
weight yarn and 3.25 mm hook.
R1 - 6 sc (6)
R2 - inc x6 (12)
R3 - (sc inc) x6 (18)
R4 - (2 sc inc) x6
(24)
R5 - (3 sc inc) x6
(30)
R6 - (4 sc inc) x6
(36)
R7 - (5 sc inc) x6
(42)
R8 - (6 sc inc) x6
(48)
R9 - (7 sc inc) x6
(54)
R10 - (8 sc inc) x6
(60)
R11 - sc around
(60)
R12 - sc around
(60)
R13 - sc around
(60)
R14 - sc around
(60)
R15 - sc around
(60)
R16 - sc around
(60)
R17 - sc around
(60)
R18 - sc around
(60)
R19 - sc around
(60)
R20 - sc around (60)
R21 - (8 sc dec) x6
(54)
R22 - sc around (54)
R23 - (7 sc dec) x6
(48)
R24 - (6 sc dec) x6
(42)
R25 - (5 sc dec) x6
(36)
R26 - (4 sc dec) x6
(30)
R27 - (3 sc dec) x6
(24)
R28 - (2 sc dec) x6
(18)
R29 - (2 sc dec) x3 +
6 sc (15)
R30 - sc around (15)
R31 - sc around (15)
Finish off and cut
yarn leaving a long tail for joining. Stuff head and neck firmly to hold shape.
Hood
Use brown chunky yarn
and 4.0 mm hook. Check to make sure hood fits. You may have to adjust increases
or decreases depending on your yarn thickness.
R1 - 6 sc (6)
R2 - inc x6 (12)
R3 - (sc inc) x6 (18)
R4 - (2 sc inc) x6
(24)
R5 - (3 sc inc) x6
(30)
R6 - (4 sc inc) x6
(36)
R7 - (5 sc inc) x6
(42)
R8 - (6 sc inc) x6
(48)
R9 - (7 sc inc) x6
(54)
R10 - sc around (54)
R11 - sc around (54)
R12 - (7 sc dec)
x6 (48)
R13 - sc around (48)
R14 - sc around (48)
R15 - sc around (48)
R16 - sc around (48)
R17 - sc around (48)
R18 - sc around (48)
R19 - sc around (48)
R20 - (6 sc dec) x6 (42)
R21 - ss loosely
around (42)
Finish off and cut
yarn leaving a long tail for joining. Position on head as shown in photos
above. After attaching head to body, I like to wrap the tail from the hood
around the neck to cover joining stitches.
Ears (x2)
Use brown chunky yarn
and 4.0 mm hook.
R1 - 6 sc (6)
R2 - inc x6 (12)
R3 - (sc inc) x6 (18)
R4 - (2 sc inc) x6
(24)
R5-7 - sc around (24)
Finish off leaving
8" tail for joining.
Fold ear in half to
form a natural curve and attach to head (see photo above).
Tail
Use brown chunky yarn
and 4.0 mm hook.
R1 - 6 sc (6)
R2 - inc x6 (12)
R3-4 - sc around (12)
Finish off leaving
6" tail for joining.
I just stuffed
starting yarn end into tail so it is only lightly stuffed then attached to form
a neat little ball on his backside (see photo above).
Refer to photos of Buster
Bear before joining ears, head, arms and tail. I like to pin the pieces in
place to pick the most pleasing look before attaching.
Be the first to comment - click on No comments: below.