Monday, 25 April 2016

Moving Day Mayhem

On Saturday we drove to Guelph to help our son move from one house to another. He was moving from a six bedroom house shared with five other students to an almost new three bedroom townhouse he will share with two friends. In almost every way his new place will be better.

We loaded up our Santa Fe with a few essentials from home - new bed linens and pillows, dishes and glasses bought on Kijiji, Costco-size oatmeal (breakfast staple), olive oil and steel-toed shoes (needed for his new job). We also bought a double mattress and box-spring on Kijiji and booked a U-Haul trailer in Guelph so we could pick up the mattress and move the rest of his stuff more efficiently. My husband bought a trailer hitch. We were organized. This was to be an easy move.
We made good time arriving in Guelph ~11 a.m. Our son was ready to go. We packed a few more things in the car and drove to the new place with our first load. We were scheduled to pick up the trailer at noon for six hours. At the house, we made a list of things we needed from the nearby Jysk and Dollarama - dish soap, garbage can, toilet brush, shower curtain and bath mat. With our shopping done, we headed out to get the trailer.

That's when the trouble started. It was a busy student area with lots of students moving. Traffic was slow and the road to U-Haul was closed. We took a detour finally reaching the U-Haul place by 1 p.m., an hour behind schedule. My husband hooked the trailer to our hitch, but couldn't connect the wires to operate the lights. We needed a special adapter. Not a problem, Canadian Tire should carry it.

Canadian Tire did not carry it. Hyundai did not carry it. Houghton trailers did not carry it, but while we were there, Hyundai called and said they might have a solution. They had an adapter another customer had ordered for their 2012 Santa Fe. Unfortunately, our 2010 Santa Fe requires a slightly different adapter. In the end, we had to cancel the trailer rental. My husband thought we might be able to tie the mattress to the roof of our Santa Fe. The mattress we had purchased was in Solstice (student housing) just two miles from our son's new house.

When we arrived, the parking lot at Solstice was crowded with U-Haul trucks, trailers and vans. It was total Moving Day Mayhem for students and parents. We managed to find a parking spot. I stayed with the vehicle while my husband and son went to get the mattress from a second floor unit. I chatted with one of the other parents waiting for his son and friends to bring stuff down to the large truck he had rented. There was only one elevator, so he had been waiting a long time. I asked if he would be willing to deliver our mattress for $20. He agreed, refusing any money. We were grateful for his help.

Once the mattress was delivered, we picked up one more vehicle load, then I stayed at the new house and set up the bedroom while my husband and son made multiple trips back and forth. It took another three hours to move everything.

By then it was 6 p.m. and we were starving. We decided to eat at Fionn MacCool's. It was delicious. After dinner, we shopped for groceries then dropped off our son and headed home to London. Our son's roommate also picked up groceries with his Mom. They should eat well this week.
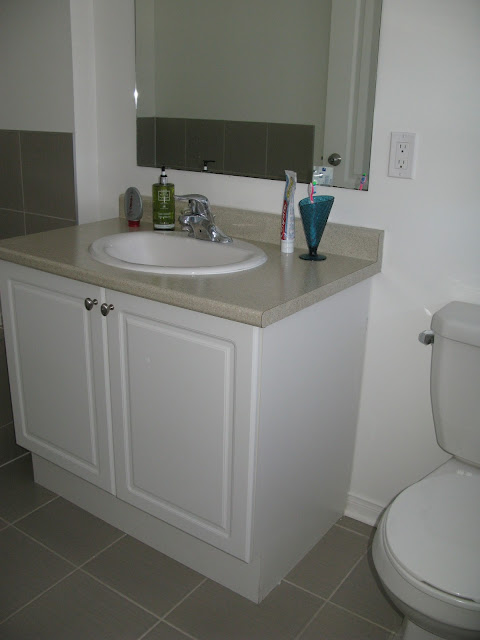
Our son is happy with his new room. The box spring and mattress look fine on the floor. The grey bed linens tone down the pinkish mauve walls. His desk fits in the corner. He has a big closet and private bathroom with a separate shower and Jacuzzi tub. The shower curtain he chose was cheap yet looks terrific. 

He feels guilty getting the largest room in the house, but it's a nice change from the small room he had last time and a bargain at only $25 more than his friend's pay per month. He's not happy with the purple and black sheer curtains, so I'll pick up neutral curtains from Costco and bring them in two weeks when we visit. 
 
 
Another friend will be moving in this week. Internet is scheduled to be hooked up soon. I think they will enjoy living here. Utilities are extra and it costs a bit more with only three people sharing, but the main issue involves a relative lack of bus service. There is a bus stop out front. Unfortunately nobody thought to check the schedule before committing.

The bus runs during school until 10:30 p.m. In the summer, there is no bus. The next closest bus stop is at the University about 4 km away. At least they have bikes and their jobs are within 5 km. If it's a problem, they can always move again next year. 

In the meantime, we plan to get an adapter for our Santa Fe so we can tow a trailer and minimize Moving Day Mayhem.


Be the first to comment - click on No comments: below

Sunday, 24 April 2016

Mister Mouse

I finally finished Mister Mouse today.  I started him months ago before our trip to Cuba, but put him aside to work on two Ripple Blankets. 

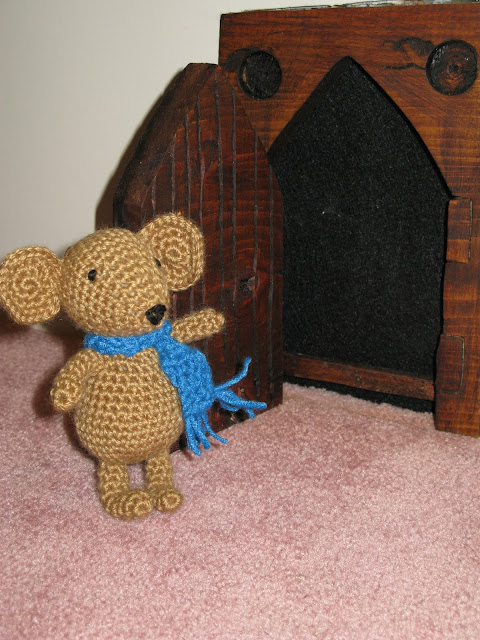
Mister Mouse was happy to pose for photos spinning round to show off his front and back. Doesn't he look dapper in his bright blue scarf?
 
After posing, I showed him the fancy faerie door in our basement. Mister Mouse opened the door. He thinks it is perfect for mice too.
To make Mister Mouse, I followed this free pattern by blogger Sharon Ojala at Amigurumi To Go. I have made a few of Sharon's patterns and loved them all. Check out her site. You won't be disappointed if you do.


Be the first to comment - click on No comments: below

Sunday, 17 April 2016

Stash-Buster Ripple Baby Blanket

I made another Ripple Blanket. I really liked the Teal Dreams Ripple Blanket finished over a week ago, but I absolutely adore this crazy colourful Stash-Buster Ripple Baby Blanket. 

When it comes to crochet, I love bright bold colours. This blanket is both bright and bold. As an added bonus, it was made using yarn from my stash. It didn't cost anything more than my time. How practical is that?


To make this blanket, I followed free instructions covering Ripple Blanket Know How posted by blogger Lucy at Attic24. Her brilliant colour combinations continue to inspire me.

Technical details for this Stash-Buster Baby Ripple Blanket are listed below for the crocheters out there who might like to make one too. 

Starting Chain - 129 (14x9+3)
Finished Size - 39"x51"
2 rows per stripe 
42 stripes
Time to Complete - Approximately 25 hours (30 mins per stripe + border
Worsted weight 100% acrylic yarn from my stash  
 
I still have a basket full of worsted weight yarn. It's good for making toys.


Be the first to comment - click on No comments: below

Monday, 11 April 2016

Celebrating April Birthdays

In our family, we celebrate two birthdays together - my Mum-In-Law's (Friday) and my Dad's (Sunday). We invited our parents for dinner on Saturday the day between their birthdays. 

We love celebrating family birthdays with dinner and cake. My husband barbecued despite frigid cold temperatures. Brrrrr .... it was unusually cold for this time of year. We gathered in our warm kitchen starting the evening with wine, sushi and conversation.

For dinner we served pork chops, potatoes (baked cut-side down in butter and Parmesan), broccoli and brussel sprouts (both baked with a sprinkling of cheese). Mmmm cheese really does make everything better.

This year, we selected a tiramisu cake from Real Canadian Superstore. The candles were blown out in one go, unlike last year when we laughed over a few failed attempts.

Cheers and Best Wishes to our parents for a fabulous year ahead.


Be the first to comment - click on No comments: below

Friday, 8 April 2016

Teal Dreams Ripple Blanket

This year, I intended to crochet using yarn from my stash. Instead, when my daughter suggested her sister-in-law who is due to have a baby any day might like a ripple blanket and praised the Sweet Summer Ripple Blanket I made for her two years ago, I couldn't resist. I rushed out to buy yarn in colours to match the nursery - teal, grey and white. I bought three shades of teal, three shades of grey and two shades of white for a total of eight different colours. I committed to making another Ripple Blanket.

This blanket took about two weeks to make. It was finished a couple days ago. I waited for a sunny day to take photos. 

I was considering calling it "Shades of Grey and Teal", but decided Teal Dreams Ripple Blanket was more appropriate. This combination of colours looks so calm and soothing. I love it.
Changing colours for each stripe creates a lot of ends to weave in and cut.
I love how mesmerizing stripey ripples look. I used approximately 1.5 balls of each colour, adding the rest to my stash. 
 
The blanket is folded and ready to go, although it will probably be months before it gets to California. We will take it with us when we visit our daughter in Boulder this summer. Our daughter and her husband travel to California regularly. Hopefully it will get there by next winter.

To make this blanket, I followed free instructions covering Ripple Blanket Know How posted by blogger Lucy at Attic24. I love all of Lucy's colourful crochet ripple blankets. Her brilliant colour combinations inspire me.

Technical details for this Teal Dreams Ripple Blanket are listed below for the crocheters out there who might like to make one too. 

Starting Chain - 157 (14x11+3)
Finished Size - 44"x62"
2 rows per stripe 
54 stripes
8 colours
Time to Complete - Approximately 30 hours (30 mins per stripe + border)

Patons Canadiana 100% worsted weight acrylic yarn:
2 balls (100 g/3.5 oz) of each colour
  • Pale Teal 
  • Medium Teal 
  • Dark Teal 
  • Pale Grey Mix
  • Medium Grey Mix 
  • Toasty Grey
  • Winter White
  • White
Hook size - 5 mm

Stripe Colours in this Teal Dreams Ripple Blanket:
  1. Pale Teal
  2. White
  3. Pale Grey Mix
  4. Dark Teal
  5. Medium Grey Mix
  6. Medium Teal
  7. Toasty Grey
  8. Winter White
  9. Toasty Grey
  10. Pale Teal
  11. Medium Teal
  12. Dark Teal
  13. Pale Grey Mix
  14. Winter White
  15. Medium Grey Mix
  16. White
  17. Medium Grey Mix
  18. Pale Teal
  19. Dark Teal
  20. Medium Teal
  21. Pale Grey Mix
  22. Toasty Grey
  23. Winter White
  24. White
  25. Toasty Grey
  26. Pale Grey Mix
  27. Medium Teal
  28. Dark Teal
  29. Pale Teal
  30. Medium Grey Mix
  31. Winter White
  32. White
  33. Medium Grey Mix
  34. Winter White
  35. Pale Grey Mix
  36. Dark Teal
  37. Medium Teal
  38. Pale Teal
  39. Toasty Grey
  40. Winter White
  41. Toasty Grey
  42. Medium Teal
  43. Medium Grey Mix
  44. Dark Teal
  45. Pale Grey Mix
  46. White
  47. Pale Grey Mix
  48. Dark Teal
  49. Medium Grey Mix
  50. Winter White
  51. Medium Teal
  52. Pale Grey MIx
  53. White
  54. Pale Teal
Border Colours:
Round 1: Pale Teal
Round 2: White
Round 3: Medium Teal


Be the first to comment - click on No comments: below